

Is your vehicle’s transfer case acting up? You might be facing issues with the Transfer Case Control Module (TCCM).
Knowing how to reset this module can save you time, money, and a trip to the mechanic. You’ll discover simple, step-by-step instructions that anyone can follow. Whether you’re a seasoned driver or just curious about your vehicle’s inner workings, understanding this reset process will give you more control over your ride.
Keep reading to unlock the easy way to fix your transfer case problems and get back on the road smoothly.

Credit: www.youtube.com
Signs Of A Faulty Transfer Case Control Module
The transfer case control module helps control your vehicle’s four-wheel drive system. If it fails, your driving can be unsafe.
Knowing the warning signs can help you fix the problem early. Here are common signs of a faulty module.
Warning Lights On The Dashboard
One common sign is warning lights on your dashboard. The 4WD or check engine light may turn on.
These lights show that the transfer case control module is sending error signals.
Difficulty Shifting Between Drive Modes
If your vehicle struggles to switch between two-wheel drive and four-wheel drive, the module may be faulty.
You might hear noises or feel the car hesitate when changing drive modes.
Unusual Noises From The Transfer Case
Grinding, clunking, or whining noises can indicate problems with the transfer case control module.
These sounds mean the module is not controlling the transfer case properly.
Vehicle Stuck In One Drive Mode
Your vehicle may get stuck in 2WD or 4WD and not switch modes at all.
This happens because the transfer case control module is failing to send the right commands.
Poor Handling Or Drivability Issues
Faulty control modules can cause poor handling, like slipping or jerking while driving.
These issues happen because the transfer case does not engage properly.
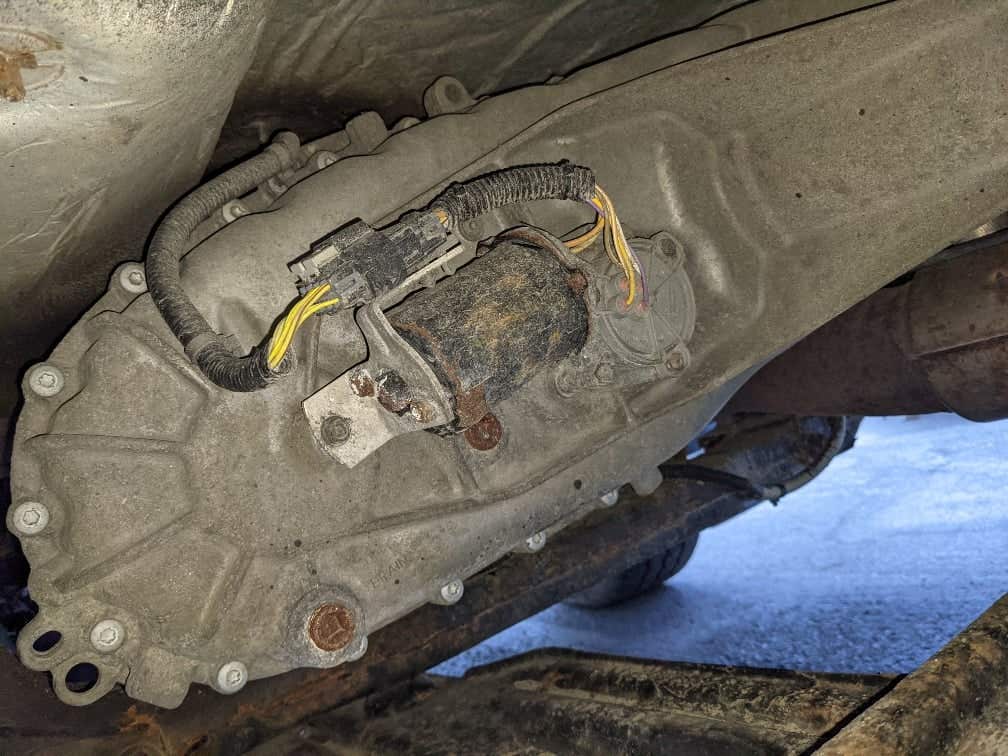
Credit: www.cumminsforum.com
Tools Needed For Resetting
Resetting the transfer case control module helps fix shifting issues in your vehicle. You need the right tools to do it safely and correctly.
This guide lists the essential tools you need before starting the reset process.
Obd-ii Scanner
An OBD-II scanner reads and clears error codes from your vehicle’s computer. It helps reset the transfer case control module.
Choose a scanner that supports transfer case and drivetrain modules. This tool shows any active fault codes and clears them after reset.
Basic Hand Tools
You will need basic hand tools like screwdrivers and socket wrenches. These tools help access the control module and disconnect it if needed.
- Phillips and flathead screwdrivers
- Socket set with ratchet
- Trim removal tools (optional)
Multimeter
A multimeter measures electrical voltage and continuity. Use it to check the power supply and wiring of the transfer case control module.
This tool helps diagnose electrical issues that may affect the reset process.
Vehicle Repair Manual
A repair manual for your vehicle model gives detailed instructions on resetting the transfer case control module. It includes wiring diagrams and safety tips.
Use the manual to follow the exact reset procedure and avoid damage to your vehicle.
Safety Equipment
Wear safety glasses and gloves when working on your vehicle. These protect you from electrical shocks and sharp parts.
Always work in a well-ventilated and dry area to stay safe during the reset process.
Step-by-step Reset Process
Resetting the transfer case control module can fix shifting problems in your vehicle. This guide shows you how to reset it safely and clearly.
Follow the steps below carefully. You will need basic tools and some time to complete the reset.
Locate The Transfer Case Control Module
The transfer case control module is usually near the transmission or under the dashboard. Check your vehicle manual for the exact location. It looks like a small black box with electrical connectors.
Disconnect The Battery
Before removing the module, disconnect the vehicle battery. This prevents electrical shocks and damage to the system. Use a wrench to loosen the negative battery cable first, then the positive cable.
- Turn off the ignition and remove the key.
- Locate the battery under the hood.
- Use a wrench to loosen the negative (black) cable.
- Then loosen the positive (red) cable.
- Remove the cables from the battery terminals.
Remove The Control Module
After disconnecting the battery, remove the screws or bolts holding the control module. Carefully unplug the electrical connectors. Keep the screws safe for reinstallation.
- Locate the mounting screws.
- Use the correct screwdriver or socket wrench.
- Remove screws and set aside.
- Gently disconnect wiring plugs.
- Take out the control module.
Reconnect And Recalibrate
Reconnect the control module and the battery. Then, recalibrate the system using the vehicle’s reset procedure. This step ensures the module works correctly.
| Action | Description |
|---|---|
| Reconnect Module | Plug wiring connectors and secure screws. |
| Reconnect Battery | Attach positive cable first, then negative. |
| Calibrate | Follow vehicle manual instructions to reset system. |
Test The System
Start the vehicle and test the transfer case functions. Check for smooth shifting and no warning lights. If problems remain, repeat the reset or consult a mechanic.

Credit: www.partcatalog.com
Frequently Asked Questions
What Is A Transfer Case Control Module Reset?
A reset clears errors and restores the module’s normal function in your vehicle’s transfer case.
How Do I Know If Resetting Is Needed?
Warning lights or shifting problems often mean the module needs a reset.
Can I Reset The Module Without Special Tools?
Some resets can be done by disconnecting the battery briefly, but tools may be needed.
How Long Does A Transfer Case Control Module Reset Take?
The reset usually takes a few minutes, depending on your vehicle and method used.
Will Resetting Fix All Transfer Case Problems?
Resetting helps with software issues but won’t fix physical damage or mechanical faults.
Conclusion
Resetting the transfer case control module can solve many vehicle issues. Follow the steps carefully and stay safe. Double-check all connections and settings before you finish. Take your time to avoid mistakes. A proper reset helps your vehicle run smoothly again.
Keep this guide handy for future reference. Simple actions can save you time and money. Trust the process and stay patient. Your vehicle will thank you.